
个人组件库展示站点搭建总结
在线预览个人组件库: Howdy
目录
Markdown-loader
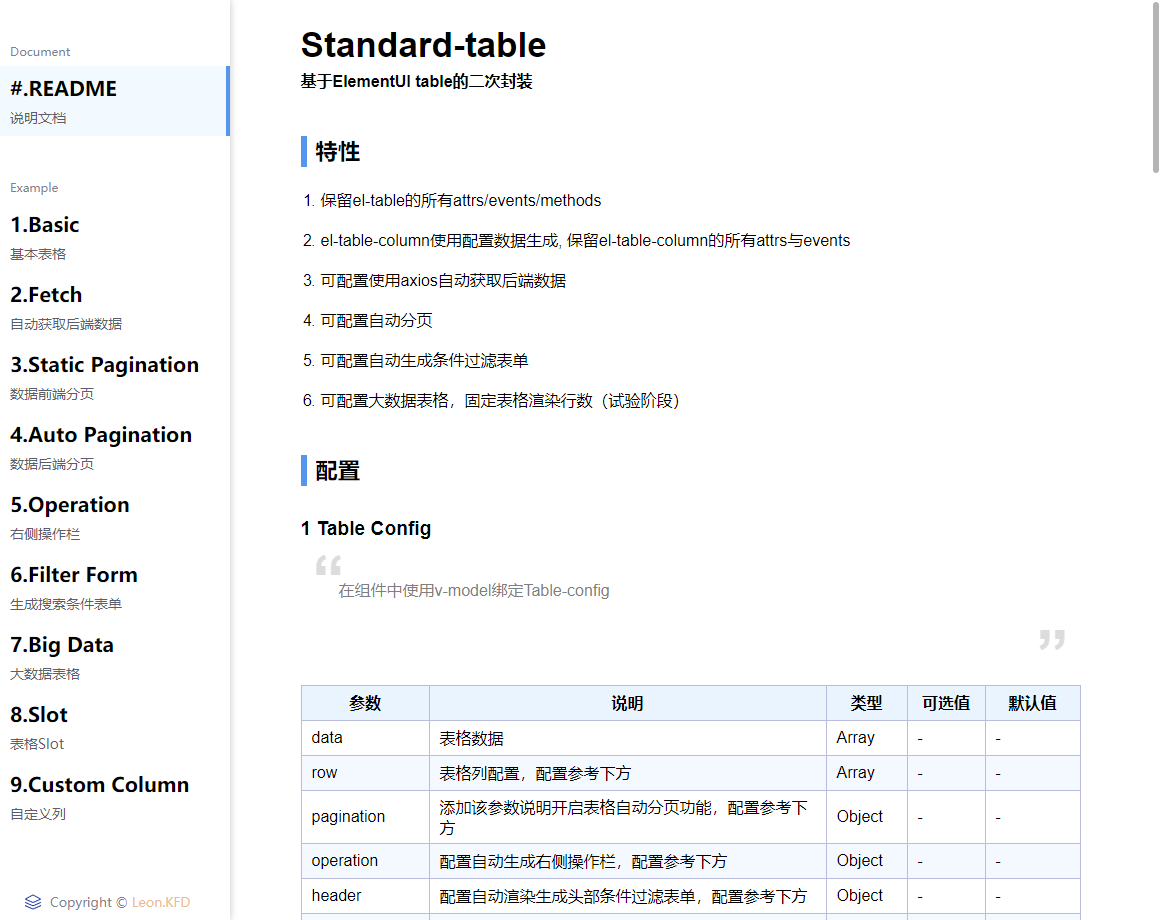
使用 Markdown-loader 可以将 markdown 文件转为 Html 代码,直接在vue.config.js中加入 webpack 相关配置。并且使用 Highlight.js 对 Markdown 中出现的代码块进行高亮展示。Markdown-loader 中可直接配置 Highlightjs。
const hljs = require("highlight.js");
module.exports = {
  configureWebpack: (config) => {
    config.module.rules.push({
      test: /\.md$/,
      use: [
        {
          loader: "html-loader",
        },
        {
          loader: "markdown-loader",
          options: {
            highlight: (code) => {
              if (
                code[0] === "<" ||
                code.includes("template") ||
                code.includes("script")
              ) {
                return hljs.highlight("html", code).value;
              } else if (code.includes("npm")) {
                return hljs.highlight("bash", code).value;
              } else {
                return hljs.highlight("js", code).value;
              }
            },
            // highlight: (code) => hljs.highlightAuto(code).value,
            pedantic: false,
            gfm: true,
            tables: true,
            breaks: false,
            sanitize: false,
            smartLists: true,
            smartypants: false,
            xhtml: false,
          },
        },
      ],
    });
    // ... //
  },
};
这里本来是用了 highlightAuto 自动识别代码语言的,但是发现效果不太理想,所有直接通过判断里面出现关键内容应用不同代码语言。
然后就可以直接通过 import 将 markdown 文件引入到代码中。例如下面 import 引入了 README.md 文件,readme 就是解析后的 HTML 代码,最后直接传给封装好的组件用 v-html 渲染出来即可。
<template>
  <div id="Readme">
    <readme-frame :readme="readme"></readme-frame>
  </div>
</template>

<script>
  import ReadmeFrame from "@/components/ReadmeFrame";
  import readme from "@/howdy/packages/standard-table/README.md";
  export default {
    name: "readme",
    components: {
      ReadmeFrame,
    },
    data() {
      return {
        readme,
      };
    },
  };
</script>
然后为渲染后的页面设定主题 CSS,可以直接在网上找现成 CSS 代码,例如可 Markdown 编辑器 Typora 的主题。
将 Vue 文件转为 Markdown
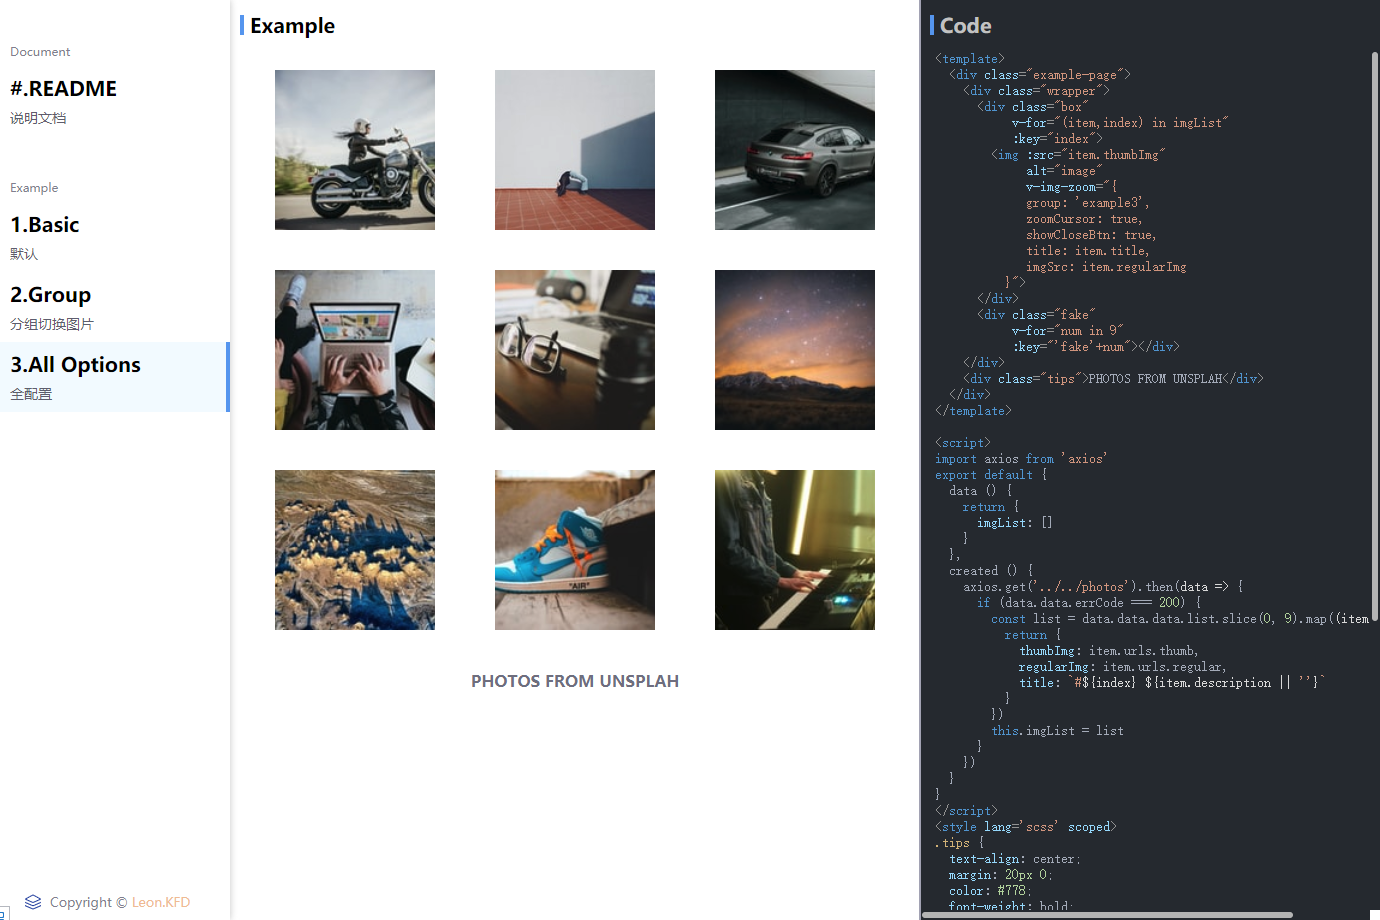
编写一个 nodejs 脚本,将相关目标组件 Example 的 Vue 文件转成 Markdown,然后通过上面 Markdown-loader 即可实现代码高亮展示。
// vue-to-md.js
const fs = require("fs");
const glob = require("glob");
const classifys = fs.readdirSync("src/pages");
classifys.map((classify) => {
  fs.mkdirSync(`src/code/${classify}`, { recursive: true });
});
glob("src/pages/**/example/example*.vue", (err, files) => {
  if (err) {
    throw err;
  }
  files.map((file) => {
    const codeFileName = file
      .replace("pages", "code")
      .replace("example/", "")
      .replace("vue", "md");
    const code = fs.readFileSync(file, "utf8");
    const output = `\`\`\`vue\n${code}\n\`\`\``;
    fs.writeFileSync(codeFileName, output);
  });
});
glob 可以使用 “ * ” 通配符匹配所需文件
在package.json文件的 vue 启动与打包命令前加入运行该脚本的命令
// package.json
"scripts": {
  "serve": "npm run vue-to-md && vue-cli-service serve",
  "build": "npm run vue-to-md && vue-cli-service build",
  "lint": "npm run vue-to-md && vue-cli-service lint",
  "vue-to-md": "node src/utils/vue-to-md.js"
}
通过路由匹配等逻辑,将生成的 example.md 文件引入到相关页面中。
async loadCode () {
  try {
    let code = await import(`@/code/${this.mainName}/${this.page.replace(this.mainName + '-', '')}.md`)
    this.code = code.default
  } catch (e) {
    console.log(e)
  }
}
路由生成优化
目前组件库中含有多个组件与指令,一个组件或指令又会含有若干个 Example,最终需要定义很多个路由(一个 Example 对于一个路由)。由于它们之间是存在很多相似的引用逻辑的,所以可以将它们抽离出来形成函数,从而不用每次手动去定义一个新的路由,只要更改传入的参数即可。
// router.js
import Vue from "vue";
import VueRouter from "vue-router";
Vue.use(VueRouter);
const packageList = [
  {
    name: "resize-directive",
    exampleNum: 5,
  },
  {
    name: "scroll-directive",
    exampleNum: 5,
  },
  {
    name: "mouse-menu-directive",
    exampleNum: 6,
  },
  {
    name: "size-observer-directive",
    exampleNum: 2,
  },
  {
    name: "animation-dialog",
    exampleNum: 3,
  },
  {
    name: "standard-table",
    exampleNum: 9,
  },
  {
    name: "img-zoom-directive",
    exampleNum: 3,
  },
];
const packageRouter = packageList.map((item) => {
  const { name, exampleNum } = item;
  return {
    name,
    routers: [
      {
        path: `/${name}/readme`,
        name: `${name}-readme`,
        component: () => import(`@/pages/${name}/example/readme`),
      },
      ...Array.from({ length: exampleNum }, (item, index) => {
        return {
          path: `/${name}/example${index + 1}`,
          name: `${name}-example${index + 1}`,
          component: () =>
            import(`@/pages/${name}/example/example${index + 1}`),
        };
      }),
    ],
  };
});
const routes = [
  {
    path: "/",
    name: "home",
    component: () => import("@/views/home"),
  },
  ...Object.keys(packageRouter).map((key) => {
    const { name, routers } = packageRouter[key];
    return {
      path: `/${name}`,
      name,
      component: () => import(`@/pages/${name}`),
      children: routers,
      redirect: `/${name}/readme`,
    };
  }),
];
const router = new VueRouter({
  mode: "history",
  base: process.env.BASE_URL,
  routes,
});
export default router;
这样下次要添加新的组件或者添加新的 Example 只需要更改packageList即可。这种方式前提是需要确保包文件目录是符合规范的。
其实还有一种更好的办法,就是编写一个 nodejs 脚本,读取文件目录自动生成路由文件,这样就能完全不需要手动配置任何路由,这种方法类似Nuxtjs的路由自动生成。
关于部署
- 由于最终的访问地址为 https://kongfandong.cn/howdy ,所以需要配置 publicPath 为 howdy,不然会出现资源 404
- 路由使用了
History模式,所以服务器端需要加入相关配置。该组件库展示站点最终是放在了Koa2的静态资源里面(因为 Example 里面涉及了一些 Mock 接口数据,为了方便把它们合在了同一个后端服务里面)。Koa2 中可以使用 koa2-connect-history-api-fallback 中间件实现 History 路由模式。
// ...
const static = require("koa-static");
const { historyApiFallback } = require("koa2-connect-history-api-fallback");
app.use(
  historyApiFallback({
    htmlAcceptHeaders: ["text/html", "application/xhtml+xml"],
    rewrites: [
      {
        from: "/howdy",
        to: "/howdy",
      },
    ],
  })
);
// 打包后的文件放在public目录下,使用koa-static放出静态资源服务
app.use(static(__dirname + "/public"));
// ...- 若是使用 nginx 搭建的静态资源服务器,可以参考官方推荐的 Nginx 配置 实现 History 模式。
在线预览个人组件库: Howdy